How to Grout Tile
After lots of planning and hard work, your tile project is nearing completion and it’s looking as beautiful as you had envisioned. And while you’re close to the end, don’t underestimate the value of the grout.
Though it may appear to be nothing more than sand and cement, the grout you choose can add color, character and charisma to the project you worked so hard on.
Step 1:
Prepare & Apply
Before you begin, be sure that you have the proper tools and materials on hand. Be sure to have grout, water, grout sealer and if necessary, caulk. As for tools, you'll need a grout float, sponge, a small paintbrush to apply grout sealer and a caulking gun, if needed.
Next, make sure your tile has had the proper amount of time to set. This is important as grouting too soon may cause your tiles to shift. Typically, you should let your tile set for 24 hours but consult the manufacturer's instructions for exact timing. Also, make sure that all spacers are removed prior to adding grout.
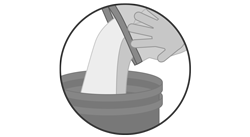
Select a grout that is recommended by the tile manufacturer for best results and follow the mixing instructions on the package. Once you have mixed the grout to the required consistency, you're ready to begin.
Apply enough grout to fill the grout joints of a small area of your project. Using the grout float and a sweeping motion, work the grout into the joints keeping the float at a 45 degree angle to help ensure they are completely filled. Once filled, use the float in the same manner to remove any excess grout. Move on to the next small area and repeat the steps until all grout joints have been filled.
When the grout begins to harden - it should just take a few minutes - use your sponge to wipe down the tiles and be careful not to remove any grout from the grout joints. Once the grout hardens completely, you'll need to break out the sponge again to remove any haze that has appeared during the process.

Step 2:
Seal
A few days after applying grout to your project, you'll want to add a grout sealer. Typically, timing is 3-7 days after pplication but refer to the instructions on the sealer for the best outcome.
Adding grout sealer to your grout will help protect it from stains that might otherwise occur. You'll want to use a sealer specified for the grout used in the project and follow the application instructions that come with the sealer.

Step 3:
Keep It Dry
Now that you've applied the sealer, you’ll want to keep the area traffic-free until the sealer has cured. Consult the manufacturer's instructions on the sealer for specifics.
Once cured, you can test the effectiveness of the sealer by putting a little water on the grout where you applied the sealer. If it puddles, the sealer is working. Now it's time to sit back and enjoy your efforts!